I hope you all had a wonderful Thanksgiving holiday and cooked some excellent food along with it. Today we will review my turkey recipe from this year and see how everything went.
Ahh, turkey, the staple of Thanksgiving tables for years and years. It is always controversial as well because the traditionalists will use turkey every year and many others don’t care for turkey because it tends to be dry, and you don’t get a lot of flavor out of it, so they go with other meat options that take its place. I am here today to tell you that I understand both sides of the argument, and provide you with the recipe I used that spoils the argument of it being dry and flavorless.
Like some people, the sides are usually where its at for me, mashed potatoes, sausage stuffing, cranberry sauce (my personal favorite), and so on, but its time that turkey gets out of the bad reputation shadow. This is my 3rd attempt at a turkey for Thanksgiving and I was starting to be convinced that there isn’t anything that can be done to save it, and I was going to try something else if I had the same problem this year. I decided that since I was going to give it one more shot, I should really try, so I did something this time that I had never done before; I brined it.
I ordered a 5 gallon food-safe bucket on the platform that shares its name with a large South American river and also got some brine bags that fit with 5 gallon buckets, and perfected my plan. I was originally going to spatchcock it this year because its fun to say, but I prefer to cook my birds whole, so that’s what I did. I did a 48 hour brine and I will share the recipe below because it was a really good brine, and its worth sharing. We did our family Thanksgiving on Saturday this year because it worked out better. Since we were doing Saturday, I pulled my 13 pound turkey out of the freezer the Sunday before. It only needs 3-4 days at that weight to fully defrost in the fridge, but since I was doing the brine, I needed the extra time.
I was asked by a friend what does brining do, so I figure now would be a good time to explain that. A wet brine is essentially a seasoned bath for a piece of meat that can last as little as 2 hours, or as long as you are willing to let it sit, that being said, anything longer than 48 hours and you run the risk of water logging the meat. The salt in the brines help equalize the salt that is already in the meat, and it helps tenderize as well. Other flavors within the brine do help with imparting some extra flavor into the meat as well. Finally, the fact that it is in water helps add extra moisture to the meat as well, so it really helps with leaner meats like turkey, or a pork loin for example. It does go without saying, but I should say it anyway, please make sure if you do brine, that it is in the fridge, it needs that cold temperature to prevent spoilage.
Once Saturday morning came around, I pulled the bucket out of the fridge, took the turkey out of the brine, placed it on a wire rack/ sheet pan combo, and patted the skin dry with paper towels. Patting the skin dry will help with the always desired crispy skin. After it was dry, I placed in back in the fridge uncovered for an hour so that the constant air movement within the fridge helped dry the skin out even further.
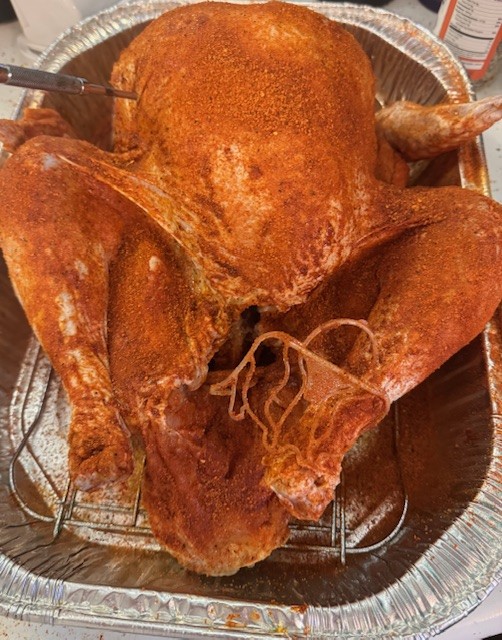
I only wanted to use one rub for the turkey given that the brine had enough salt in it, but I still needed something to help bind the rub to the turkey. Any sort of fat will do, like oils and butter, but I chose to use a duck fat spray. The duck fat spray will also help with the crispy skin, and add some richness to the outside of the turkey. Once the duck fat was all over the bird, I applied a very good layer of my Lovely Jubbly BBQ And Then Some rub to the entire outside of the turkey, as seen below. You can also see my meat probe in the breast there. This turkey came with one of those pop-up temperature thermometers, I hate them, so I took it out and placed my own probe in there instead.
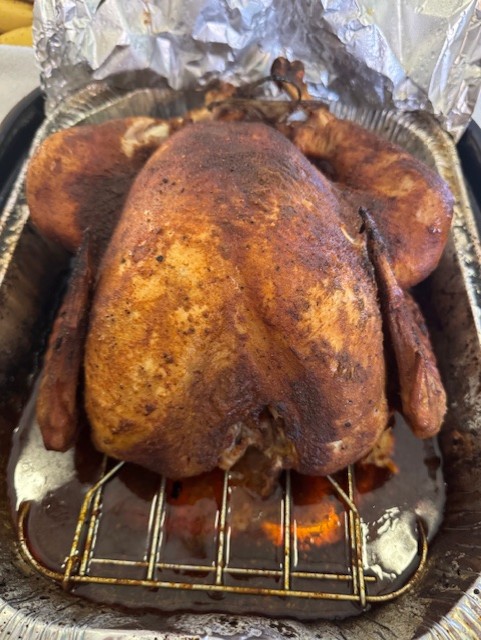
I cooked the turkey on my Pit Boss Sportsman 1100 pellet grill and I set it up to cook at 300 degrees with my favorite Lumber Jack Competition Blend pellets. I also had a fully cooked turkey breast as well that I cooked along with this turkey, but since it was fully cooked already, I was just warming it through, so I am not going to focus on that one much since it was just to supplement meat. An hour into the cook, I took my duck fat spray can and resprayed the outside of the turkey and I also spun the turkey around so the other side of it would be exposed to more heat, and cook more evenly. Once the internal temp of the breast was about 150, I went and check on the bird and I was very happy with the color, so at that point, I added some chicken broth to the aluminum pan and wrapped it in foil until it was done. At 300 degrees, I expected a 13 pound turkey to cook at about 15-18 minutes per pound, or about 3-3.5 hours, but surprisingly it was done in 2.5 hours. I pulled the bird out and let it rest in the foil and under a towel until the other breast was done.
In review, this was my 3rd attempt at smoking a Thanksgiving turkey, and if it didn’t come out as well, it probably would have been my last. I am pleased to say that not only was this bird pretty, but it was also the juiciest and most flavorful turkey I have ever had. It was an overwhelming success, the only down side was that I lost the crispy skin because we had a 30ish minute drive to where we were eating, but that doesn’t change the flavor and the look of it.
Brine Ingredients:
- 1, 5 gallon FOOD SAFE bucket
- 5 gallon brine bag
- 1.5 cups of kosher salt
- 1/3 cup brown sugar
- 1/4 cup of Worcestershire Sauce
- 3 table spoons minced garlic
- 1 tablespoon ground black pepper
Turkey Ingredients:
- 1, 13 pound turkey
- The And Then Some BBQ rub
- Duck fat, or any other form of fatty oil
Recipe:
- Place the turkey in the brine and give yourself 48 hours for it to sit in the fridge.
- Once the 48 hours is complete, remove turkey from the brine, do not rinse.
- Pat the skin dry and place in fridge uncovered for 1 hour
- Remove from the fridge after 1 hour, coat the turkey in the oil and liberally apply the rub to the entire turkey
- Set smoker to 300 degrees and place turkey on the pit.
- After an hour, re-oil the outside of the turkey and turn it around to even out the heat exposure
- Once the breast reaches 160 degrees internally, pull the turkey off to rest.
- Serve hot, but make sure the turkey is above 140 degrees internal before eating, for food safety.
Find the And Then Some, along with many other BBQ tools and equipment at http://www.lovelyjubblybbq.com today!
As always, keep cookin’ and Lovely Jubbly!
