Featured

Gadgets and Gizmos Aplenty

This week I am going to take a slightly different approach and talk about my equipment that I use in both competing and cooking at home.

To start, I am going to talk about my smokers. I have my Masterbuilt 1050 Gravity Series Charcoal Vertical Smoker. I saw this online a few years ago and my first thought was “this would be a great rib cooker” as I was right. It runs on charcoal and wood chunks and holds temp like an absolute tank. It is ran by a small electric fan that helps keep the temperature exactly where you want it to be. I use it at competitions as well because consistency is key when cooking competition BBQ and this smoker does exactly that.

I also have 2 Pit Boss pellet grills, the Classic, and the Sportsman 1100. They both operate the same, load with pellets and set and forget. The Classic has 700 sq in of cooking space and it was the first smoker/ grill I bought for myself that started the landslide into what I have going on now. I usually use the Classic for my competition chicken because the constant air movement in the cooking chamber is great for rendering fat. The Sportsman 1100 got its name because it has exactly 1600 sq inches of cooking space (I know, I don’t get it either). The bigger cooker is my primary for pork butts, especially overnight because I can set the temp, put the butts on and go to bed, knowing full well that I have nothing to worry about.

I have 2 trusty Weber 22′ kettles. I keep one, the Performer, which is the kettle attached to a cart which is very handy for moving around, I keep that one in the competition trailer for cooking lunch and now steak competition cooks. I have another Weber, which I actually bought from my dad a few years ago and since then, I have burned through the cooking grate on it and it is losing paint within the lid because I use it so much at home.

One of the new acquisitions of mine is the Oklahoma Joe’s Bronco drum smoker. I have always wanted a drum and the price point was good enough on it that i finally pulled the trigger this summer. Drum cookers are very popular on the competition circuit and just as popular for backyard cooks because they run on charcoal/ wood and air flow, that’s it. What’s cool about my drum is that I was able to get it in orange, which goes with my team/ company colors.

Finally, I have my newest smoker that I picked up right before this last competition and it is my Old Country BBQ Pits G2 insulated offset smoker. I talked about this, along with the competition trailer in my summary of the Adams Rib Rib & Steak Challenge post last week. My Hog roaster that I bought this year as well is covered in my The Whole Hog post.

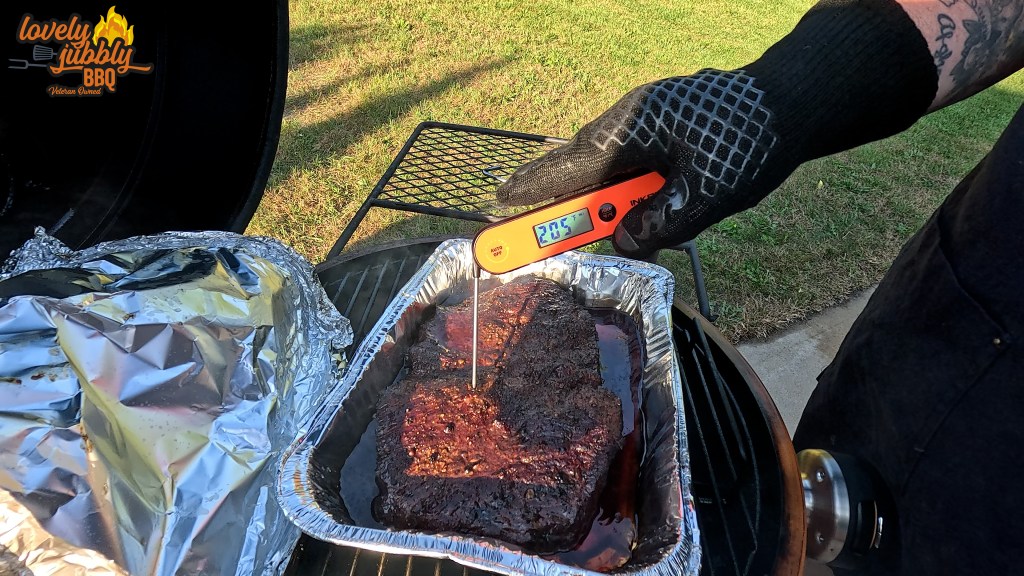
Other tools I have are my Inkbird instant read thermometer, which I have had for almost 4 years now and it has been one of my favorite cooking tools I have ever had. It has never lost calibration in that time, and it has a rechargeable battery that last for a very long time. I also have my Vortex cone which is great for wings, and using a a heat sync for indirect cooking on the Weber. More on the Vortex in my Chicken!! post. I also have a Govee Home 4 probe WI-FI thermometer that I found on Amazon that really works quite well. It gives me piece of mind knowing that I can set the desired temp for the meat and it will let me know when it gets to that temp and I don’t have to open the lid as much.

Lets talk charcoal now. I have really come to enjoy Blues Hog charcoal briquettes because they are bigger and burn longer. I also enjoy Royal Oak Lump Charcoal as well. Pellets wise I enjoy Lumberjack Competition blend which is a blend of Cherry, Hickory and Maple, it adds great flavor and smells even better while cooking. To light my fires, I use Royal Oak Tumbleweed fire starters on a charcoal chimney to start the charcoal, and Masterbuilt fire starter blocks for lighting the Masterbuilt because they were specially made for these types of cookers.

Wagyu Brisket Burnt Ends

This post is the follow up to my Wagyu Brisket Burnt Ends video that I just released. This recipe was fantastic and I highly recommend it to anyone!

These burnt ends came from the point of the Snake River Farms Gold Grade Wagyu Brisket I bought for my last BBQ competition at the beginning of September. I decided I only wanted to do slices for my turn in, so I saved the point for exactly this. I figured that a really nice cut of meat would be great for my first video, and be a really nice way to spend a Saturday. We filmed this video at my Dad’s house because it has a really nice backdrop, so I figured it made for good video. There was a lot of traffic noise because it’s a busy road, but people have lives, so it is what it is.

As you’ll see in the video, there was a lot of fat on this point that I trimmed down to only keep what would render, but also protect the meat while it cooks. The point was sort of mound shaped, and to fix that, I butterflied it open so it would lay flat, and this will also help it cook evenly as well. I then seasoned it with a good layer of my Lovely Jubbly BBQ The Everything all purpose seasoning on all sides of the brisket. The courser grindings in this rub are great for forming a good bark and crust on the exterior of the meat.

I decided that I had been under using my Oklahoma Joe’s Bronco drum smoker, so I made the decision to use it for this recipe. No other smoker cooks like a drum and the flavor you get back into the meat from the drippings landing the coals just maximizes the BBQ flavor. I used my favorite lump charcoal from The Good Charcoal Company and Oak wood chunks from Smokey Woods BBQ for this cook, both companies I HIGHLY recommend their products to everyone. I also used my Chefs Temp S1 Digital Temp Gauge on the drum as well for more accurate temperature readings.

The plan for this cook was to put the brisket on at 250 degrees and let it cook to about 160-165 degrees internal and then wrap it until it hits around 205. It took about 3 hours for it to get to 165 degrees and then I placed it in an aluminum tray with a cup of Oxo beef stock to help reinforce the beef flavor that I wanted to maintain in the meat. It was wrapped for about 2 hours before it finally became probe tender, at right about the 205-207 degree mark.

Once the brisket was done, I pulled it out of the tray and put it on the cutting board for about 10-15 minutes (covered with a bug shield, the flies were terrible) to allow it to cool down a little bit before cutting it up. If I had started cubing it up right after pulling it off the pit, it would have just fallen apart. Allow it to cool made it easier for me to cube it as needed. I then started cutting it up into 1″ strips against the grain, and then cut the strips into 1″ pieces as well. I then gave the cubes another layer of The Everything rub on all sides, and then moved them into another aluminum tray. True Kansas City style burnt ends should have an element of sweetness, so I gave the burnt ends a coat of light brown sugar and then another layer of Blues Hog Smokey Mountain BBQ sauce.

I put them back on the pit for about another hour to render more fat and allow the sauce/sugar mixture to caramelize. After an hour they looked like perfect little brisket nuggets and they smelled sensational. I pulled them out of the tray and into a small pile on the cutting board where I gave the review of the entire cook, and then it was finally time to eat. The first bite was soft, really strong beef flavor, and absolutely melt in your mouth perfect. The oak wood chunks gave a great smoke flavor that wasn’t over powering, and they were so juicy and tender.

I will say, one thing I learned in this process is that you watch a BBQ recipe video online and you see roughly 10-15 minutes of a recipe from beginning to end, but you never think about the downtime in between takes. The biggest thing I didn’t realize was that there should be more time in between loading the cutting board at the end and actually tasting them. Good lord they were hot, and in watching the video you can see my eyes widen a little bit as I take the bite. Lesson learned.

Please make sure you give this recipe a try. It can absolutely work for a non-Wagyu brisket point as well, just monitor your temps towards the end of the cook because non-Wagyu doesn’t typically need to finish as high as a Wagyu cut does. It also makes great appetizers, and game day foods as well. Tell me what you think!

Don’t forget to check out http://www.lovelyjubblybbq.com for our signature rubs and even more great BBQ products and accessories! Our rubs are also exclusively in store at Ava’s a posh boutique in Watertown, WI, if you just can’t wait for shipping!

If you are looking for a Pit Boss pellet grill or other Pit Boss accessories for yourself or someone you love, follow the link below to the Pit Boss website, where they have some fantastic deals on some even more fantastic products! As an avid Pit Boss user, I couldn’t be more proud to be an affiliate of Pit Boss Grills, and I look forward to growing this partnership over time. We have also become affiliated with Weber Grills as well, which is my favorite grill of choice for cooking everyday meals. We have the Weber Grills link below as well for your convenience! Our newest Affiliation is with Inkbird Tech! They have the best line of thermometers I have ever used, and I take my instant-read everywhere I cook, so I always know what my temps are. Get your Inkbird today!

Pit Boss Grills- https://pitbossgrills.77jaha.net/zxx49x 

Weber Grills- https://weberinc.sjv.io/e1kGrZ

Inkbird Tech- http://shrsl.com/2qjiv-3hr3-1lu98

Follow us on social media at Lovely Jubbly BBQ on Facebook, and @LJBBQ22 on Instagram!

We also have a community on Facebook, look up Lovely Jubbly BBQ Community and connect with us today!

As always, keep cookin’ and Lovely Jubbly!

Football Snack Foods

Our long national nightmare is over, my friends. Football is back! Not only is Football about supporting your team and watching games with your friends and family, but what is a Football party without some delicious food? This week, we bring the blog back by talking about my featured Football game-day foods that are a must-have at your party!

Sure, you could order pizza, especially since there are so many pizza-related ads on during commercial breaks, but be the spawning Salmon and swim against the current. First, let’s discuss the ideal foods to serve at a game-day party. Finger foods, and lots of them. Chicken wings, pigs-in-a-banket, chips, meatballs, and so much more are great options at a party because you can cook them quickly and make a lot of them at one time. Usually, a larger, primary option at the center of the food variety, such as pulled pork, is a good idea too, because it gives your spread a focal point. This is also a good option because anyone reading this is like me and loves meat with more meat as a side.

I decided that since my game-day party consisted of myself, my wife, and our daughter, I would keep it simple this time around. I would normally do an opening day of Football party, but my Vikings opened up the year on Monday night, so I waited until then. While traveling a little while ago, I came up with a potential recipe idea for Garlic-Parmesan Wings that I have been really wanting to try, along with some mini bagel pizzas, and an old classic, homemade queso dip.

For the queso dip, I started with a medium yellow onion, finely diced it, and then added it to an aluminum tray. Then I grabbed a can of diced tomatoes with green chiles, added it to the tray, and chopped up a serrano pepper for some warmth and flavor. I then took a 32-oz “block” of Velveeta and cubed it up, adding it to the pan with everything else. I had a 1LB pack of 80/20 ground beef, browned it, and added a packet of taco seasoning, then this went into the pan as well. I topped it off with some freshly grated cheddar-jack cheese and put it on my Pit Boss Sportsman 1100 at 300 degrees.

Garlic-Parmesan wings are a favorite of mine, and I wanted to try and come up with a new way to make them. I cooked the wings at the same time as the queso dip, so on the Pit Boss Sportsman 1100 at 300 degrees. I chose not to season the wings, so the garlic butter would make up the flavor profile on the wings. I came up with the idea of setting up a double boiler with a glass bowl over a boiling pot, and dropped a pound of butter in the bowl and let it slowly melt. I went with a double-boiler setup because I didn’t want to risk the butter turning brown and giving an off color to the wings. After the butter was melted, I added in 2 heaping tablespoons of jarlic (jarred garlic, obviously) and let the garlic start to dissolve and flavor the butter. After that, I added about 4 ounces of finely and freshly grated Parmesan cheese and stirred it in so it would melt. Once the wings were at about 180 degrees internal, I pulled them off the smoker, placed them in a bowl, and ladled some of the garlic-parmesan butter on the wings and tossed them until evenly coated.

And finally, the mini bagel pizzas. These are a lot more straightforward, but I found them to be much better than the frozen mini bagel pizzas that you can find at any store (you know the ones). I started with mini bagels and separated them top and bottom. I then took my favorite squeeze bottle pizza sauce and coated the bagel tops completely. I added some store-bought pizza cheese blend to each bagel top and added toppings as my family likes them. I did some with pepperoni, some with just cheese, and some with mushrooms. I put them in the oven at 375 for about 10 minutes, until the edges of the bagel were browned and crispy, and the cheese was bubbling.

Overall, it was a great spread of Football party finger foods, and the best part about gameday foods is that you can switch things up every week and never eat the same thing twice.

Don’t forget to check out http://www.lovelyjubblybbq.com for our signature rubs and even more great BBQ products and accessories! Our rubs are also exclusively in store at Ava’s a posh boutique in Watertown, WI, if you just can’t wait for shipping!

If you are looking for a Pit Boss pellet grill or other Pit Boss accessories for yourself or someone you love, follow the link below to the Pit Boss website, where they have some fantastic deals on some even more fantastic products! As an avid Pit Boss user, I couldn’t be prouder to be an affiliate of Pit Boss Grills, and I look forward to growing this partnership over time. We have also become affiliated with Weber Grills as well, which is my favorite grill of choice for cooking everyday meals. We have the Weber Grills link below as well for your convenience! Our newest Affiliation is with Inkbird Tech! They have the best line of thermometers I have ever used, and I take my instant-read everywhere I cook, so I always know what my temps are. Get your Inkbird today!

Pit Boss Grills- https://pitbossgrills.77jaha.net/zxx49x 

Weber Grills- https://weberinc.sjv.io/e1kGrZ

Inkbird Tech- http://shrsl.com/2qjiv-3hr3-1lu98

Follow us on social media at Lovely Jubbly BBQ on Facebook, and @LJBBQ22 on Instagram!

We also have a community on Facebook, look up Lovely Jubbly BBQ Community and connect with us today!

As always, keep cookin’ and Lovely Jubbly!

Rub Layers

This instructive post is simply about how to properly layer rubs so you are maximizing the flavor on your meat, but not overdoing it and making it too salty.

Using multiple rubs is a great way to increase the flavor of your meat and add different flavor profiles to make your taste buds do a little happy dance. I am going to use ribs as my example simply because that is the one meat I cook more than anything else due to the amount of competitions I do.

I start with a thin base layer of our Lovely Jubbly BBQ’s The Everything all-purpose rub to start the layering process. I do a layer on the top of the ribs, let it sit for 15 minutes, then flip the ribs over and do the bottom side. I do not do the sides of the ribs with the base layer because the second layer will season the sides. Since this base layer is light, coating the sides of the ribs isn’t going to help the flavor at all, so it isn’t worth wasting the rub.

The second layer is our Lovely Jubbly BBQ’s And Then Some BBQ rub, and I typically will go heavier with this rub because the spices in this rub are going to be the primary flavors when you bite into the finished rib. The redness of the rub is also what gives your ribs the perfect mahogany color that every pitmaster desires. The upside to this rub being mostly red in color is that it makes it really easy to see if you missed any spots, which allows you to fill in the gaps and ensure even coverage.

Like with The Everything, I would do one side, wait 15 minutes, and then flip the ribs to do the other side. Once the 2 main sides of the ribs are evenly coated, then I season the sides and make sure the entire rack is seasoned. Then I will usually let them sit for about 15 minutes before putting the ribs on the smoker. After the cook, and this is only for competitions, I will use the Weekend Bum BBQ Hot Bum rub in my handy dandy thumb grinder for a little pop of flavor at the end. I add that when I add the ribs to the smoker after saucing them, so the sauce activates the rub and doesn’t leave a gritty feeling in the judges’ teeth, which does and will affect the judges’ scores. At home, you don’t need to do a third layer if you don’t want to.

I will also be releasing a demonstration video of my rub technique soon!

Don’t forget to check out http://www.lovelyjubblybbq.com for our signature rubs and even more great BBQ products and accessories! Our rubs are also exclusively in store at Ava’s a posh boutique in Watertown, WI, if you just can’t wait for shipping!

If you are looking for a Pit Boss pellet grill or other Pit Boss accessories for yourself or someone you love, follow the link below to the Pit Boss website, where they have some fantastic deals on some even more fantastic products! As an avid Pit Boss user, I couldn’t be more proud to be an affiliate of Pit Boss Grills, and I look forward to growing this partnership over time. We have also become affiliated with Weber Grills as well, which is my favorite grill of choice for cooking everyday meals. We have the Weber Grills link below as well for your convenience! Our newest Affiliation is with Inkbird Tech! They have the best line of thermometers I have ever used, and I take my instant-read everywhere I cook, so I always know what my temps are. Get your Inkbird today!

Pit Boss Grills- https://pitbossgrills.77jaha.net/zxx49x 

Weber Grills- https://weberinc.sjv.io/e1kGrZ

Inkbird Tech- http://shrsl.com/2qjiv-3hr3-1lu98

Follow us on social media at Lovely Jubbly BBQ on Facebook, and @LJBBQ22 on Instagram!

We also have a community on Facebook, look up Lovely Jubbly BBQ Community and connect with us today!

As always, keep cookin’ and Lovely Jubbly!

The Perfect Pork Loin

The recipe feature for this week is a perfectly cooked Pork Loin. The best part about it is that I didn’t actually cook this; my daughter did!

If anyone reading this likes to cook and has younger kids, I really recommend getting them involved. Not only is it a great life skill, but by showing your kids how much fun it is to make their own food, you encourage creativity and help them learn flavors and grow their own palate.

This recipe started when my daughter wanted to do the Kid’s Que at the Minnesota in May BBQ competition, and the meat of choice for the kids was a Compart Duroc Pork Loin. The rules are that the kids are encouraged to do as much work as they can, but parents can help with things like handling the fire and knife work if the child isn’t comfortable.

The pork loin is a very lean piece of meat from closer to the spine of the pig. Because it is lean, it can overcook and dry out very easily. Pieces of leaner meat, like the loin, are a great example of a piece of meat you can pull off a few degrees shy of the ideal cook temp and let it carry over. Carry over is what happens to a piece of meat when you take it off the pit, and you can see the internal temperature continue to rise for a few minutes after coming off the pit. Usually, the higher the cook temp, the more it will carry over.

Seasoning was very simple with this one. A light base layer of Lovely Jubbly BBQ’s The Everything all-purpose seasoning and a solid layer of the And Then Some BBQ rub as well for color and flavor. We used the Masterbuilt GS 1050 for this cook and loaded it with The Good Charcoal lump charcoal, and cherry wood chunks from Smokey Woods BBQ.

Pork’s ideal minimum temperature is 140 degrees, so if you pull it at 135, it will carry over to above 140, and it will come out snow white and glistening inside (exactly what you want). We cooked this at 275, so it carried over until about 143-144 before the temp started to even out. This cook took just a little less than an hour, and we let it rest for about 15- 20 minutes. Given that she came in first, we know how it turned out. ( I’m dad, I’m allowed to brag.) We gave the loin a simple glaze of Blues Hog Champions Blend sauce and set the sauce for about 5-10 minutes so it was tacked up.

Trust me, this recipe is a keeper. I have never bit into a piece of pork that was as soft as this before. I ended up making it into a sandwich with a slice of Muenster cheese, and it was absolutely to die for.

Ingredients:

  • 1 pork loin, 3-4 pounds.
  • Lovely Jubbly BBQ’s The Everything all-purpose seasoning
  • Lovely Jubbly BBQ’s And Then Some BBQ rub
  • Blues Hog Champions Blend BBQ sauce

Recipe:

  • Trim/ score the exterior fat of the loin, as rub will not penetrate fat.
  • Season with The Everything on all sides of the loin
  • Set up smoker for 275 degrees
  • Season liberally with the And Then Some on all sides of the loin.
  • Place on the smoker and let cook until 135 degrees internal
  • Once at 135 degrees, sauce with the Blues Hog Champions Blend and put back on for 5-10 minutes until the sauce is tacky
  • Pull the loin off and let it rest for 15-20 minutes
  • Slice to desired thickness and enjoy!

Don’t forget to check out http://www.lovelyjubblybbq.com for our signature rubs and even more great BBQ products and accessories! Our rubs are also exclusively in store at Ava’s a posh boutique in Watertown, WI, if you just can’t wait for shipping!

If you are looking for a Pit Boss pellet grill or other Pit Boss accessories for yourself or someone you love, follow the link below to the Pit Boss website, where they have some fantastic deals on some even more fantastic products! As an avid Pit Boss user, I couldn’t be more proud to be an affiliate of Pit Boss Grills, and I look forward to growing this partnership over time. We have also become affiliated with Weber Grills as well, which is my favorite grill of choice for cooking everyday meals. We have the Weber Grills link below as well for your convenience! Our newest Affiliation is with Inkbird Tech! They have the best line of thermometers I have ever used, and I take my instant-read everywhere I cook, so I always know what my temps are. Get your Inkbird today!

Pit Boss Grills- https://pitbossgrills.77jaha.net/zxx49x 

Weber Grills- https://weberinc.sjv.io/e1kGrZ

Inkbird Tech- http://shrsl.com/2qjiv-3hr3-1lu98

Follow us on social media at Lovely Jubbly BBQ on Facebook, and @LJBBQ22 on Instagram!

We also have a community on Facebook, look up Lovely Jubbly BBQ Community and connect with us today!

As always, keep cookin’ and Lovely Jubbly!

New Ideas

This post is a little different because I am trying something new over the next couple of months to help increase my presence on social media, and the blog is going to continue to be a part of that, but in a different format. I am still going to be trying new recipes and offering them, and encouraging you to try, but I am also going to be touching on other topics as well, and try to engage more of the community.

I remember as a kid seeing my parents grilling on a gas grill, typically brats, hot dogs, and burgers, because that’s what my brothers and I liked. As I got older, I started using the grill too to make the same things, and I figured that as long as I didn’t burn the majority of the food, I was doing alright. We would host cookouts on weekends, and it was usually always the same meats because they were always crowd pleasers, and chicken would be put in the mix too. I remember that for one of my brother’s High School graduation parties, my mom made pulled pork in the crock pot. It was very good, but it was really my first taste of pulled pork that I can remember.

Easter of 2019, we decided as a family to switch it up and do a family rib cook-off for our Easter meal instead of the traditional ham. I decided that it was a competition I wanted to try and win, so I took advantage of the fact that my wife worked at a bookstore at the time and went and started reading BBQ cookbooks, looking for ideas. I only knew about baby back ribs at the time, which was fine because that is all anyone ended up using, but I had some fun researching what BBQ was for the first time. I took everything I learned, made up a makeshift rub from some of my research, and then proceeded to put them in the oven for 3-4 hours at 225, and then finished them on the gas grill for some char. They were good, and I ended up having the best ribs of the day, but they were nothing compared to how things became.

We ended up having another occasion for me to make ribs later in the year, and my mom provided me with some wild boar ribs she had acquired from a friend, and essentially did the exact same recipe. This second time made them sparked something in me, and I decided that I wanted to start looking into this rib cooking thing a little more. I got a Masterbuilt electric cabinet smoker from Fleet Farm during Covid and used it to cook a turkey and ribs for Thanksgiving that year, and that was it, I bit the hook and was on the line. I ended up selling the Masterbuilt and bought my first Pit Boss pellet grill from Walmart, and the rest is really history. I started developing my own rubs, which consisted of just throwing ingredients together, and for the most part, it worked, but I was still missing something. I ended up hearing about this book called Paul Kirk’s Championship Barbecue Sauces “175 Make-Your-Own Sauces, Marinades, Dry Rubs, Wet Rubs, Mops, and Salsas,” and this book flipped my world upside down. It taught me about ratios and measurements and how to build a rub, which, after a lot of time and effort and trial and error, I came down with the recipes that I now manufacture and sell in my online store.

As I write this (5/29/25), I found out on Facebook the day before that Paul Kirk, The Baron of Barbecue, who had written this fantastic book, passed away over the Memorial Day weekend. The news was very sad for me because while I never met Paul, I still felt like I did because I wouldn’t be where I am without him, so Rest in Peace, Mr Kirk, and thank you.

One Pit Boss turned into 2 as I was asked to do the food for my stepdad’s **th (you’re welcome for that, Peter) birthday party at their home in Monticello, Minnesota. The idea was that I needed a much bigger smoker to accommodate all of the food I was going to be doing, and the plan was to order the new Pit Boss Sportsman 1100 and have it delivered to their home, cook on it, and then bring it home with us. Naturally, nothing goes to plan, so the delivery was delayed, and it never came in time for the party. This left me to cook 2 pork butts, 2 brisket flats and some burgers on a 4 burner gas grill. I did one of the flats in a Nesco slow cooker, and did the butts and the other flat on the gas grill at a low temp overnight. I burned the brisket flat on the grill and had to throw that out, but I managed to somehow pull off the pork butts. I was not pleased with the outcome personally, but they were edible, and I was told that they were good.

Then I decided to get into competition BBQ, and that is a story for another time, in part 2. This is my history of outdoor cooking and how it has evolved into the baseline for what I have now. I hope you all enjoy the new format for the summer, and I also hope you all contribute your own origin stories as well!

Don’t forget to check out http://www.lovelyjubblybbq.com for our signature rubs and even more great BBQ products and accessories! Our rubs are also exclusively in store at Ava’s a posh boutique in Watertown, WI, if you just can’t wait for shipping!

If you are looking for a Pit Boss pellet grill or other Pit Boss accessories for yourself or someone you love, follow the link below to the Pit Boss website, where they have some fantastic deals on some even more fantastic products! As an avid Pit Boss user, I couldn’t be more proud to be an affiliate of Pit Boss Grills, and I look forward to growing this partnership over time. We have also become affiliated with Weber Grills as well, which is my favorite grill of choice for cooking everyday meals. We have the Weber Grills link below as well for your convenience! 

Pit Boss Grills- https://pitbossgrills.77jaha.net/zxx49x 

Weber Grills- https://weberinc.sjv.io/e1kGrZ

Follow us on social media at Lovely Jubbly BBQ on Facebook, and @LJBBQ22 on Instagram!

We also have a community on Facebook, look up Lovely Jubbly BBQ Community and connect with us today!

As always, keep cookin’ and Lovely Jubbly!

Minnesota in May 2025

This week is a review of the annual Minnesota in May BBQ competition that was this past weekend!

Not only was this my first time at Minnesota in May, but I decided to also make it my first time competing in the Kansas City Barbecue Society’s (KCBS) Masters Division as well. KCBS has 2 main divisions, Masters and Backyard. The Backyard division is Ribs and Chicken, and the Masters is Ribs and Chicken as well, but also adds Pork and Brisket. I have cooked many briskets and pork shoulders in the last few years, but never for competition, so I had to do a lot of research on how to make it work like it should.

I decided I was going to bring my Masterbuilt Gravity Series 1050 to cook the ribs and chicken on, and then my Old Country BBQ Pits G2 insulated offset smoker for the pork and brisket. I took the day off work on Thursday to get the trailer all ready to go, and tried to get as much ready to go as I could so that Friday was a travel and an ancillary cook day. For the meat, I decided to try the company Mister Brisket Inc. in Ohio to source my competition meat. I ordered an Imperial Wagyu Brisket flat, 2 pork collars, or “money muscles”, and 3 racks of Prairie Fresh Prime Spare Ribs. I sourced chicken legs locally, and already had some pork butts in the freezer to do pulled pork.

This was my first time cooking Wagyu beef of any sort because it is expensive, but despite that, I know how to cook a brisket, so I basically just did what I normally would do, with the exception of using the offset for it, which was a first as well. I wouldn’t normally do a Wagyu brisket, but that’s what the champions cook, and as the old saying goes, “When in Rome…” The point of using pork collars is to get really tender pork slices to put in the box and offer the judges some pulled pork, and sliced as well. The really nice part about ordering the meat from Mister Brisket is that the brisket was already trimmed and basically just needed injecting, rubbing, and smoking.

We drove to Saint Peter, Minnesota, in about 6 hours, with stops and such, and got our site at the Nicollet County Fairgrounds. Conveniently, we ended up getting parked right next to our good friends at BBQ Pit Bros and Chester’s Twisted Que, so this made for a very fun time. We only signed up to do one of the Friday night ancillary cooks, and that cook was the Kids Que. Ellie wanted to do the cooking, and the meat they wanted cooked was a Compart Duroc 1/3 pork loin. I’ll get to her results later.

After Kids Que was done and we had dinner, I got back to the cook site and started injecting and prepping the various meats, starting with brisket and pork since they were going on first. I used Butcher BBQ’s original brisket injection and gave a base layer of the Lovely Jubbly BBQ’s The Everything all-purpose rub, and then a primary layer of Hot Bum, which is a rub from our sponsor at Weekend Bum BBQ. I let the brisket rest in the cooler while I started prepping pork. Unfortunately, the pork butts froze again partially and I didn’t have time to let them defrost, so I ended up cooking the money muscles only. I injected them with Butcher BBQ’s Pork Injection and rubbed them with both Lovely Jubbly BBQ rubs, The Everything, And Then Some. I fired up the offset with The Good Charcoal, which was another first-time product for this weekend as well.

I got the offset up to 250 degrees and put the brisket flat on around 1:15am. The pork collars went on at about 6:30, and then it was time for prepping the ribs and eventually chicken. The ribs were the same recipe as usual, so you can see that here at (Ribs! Ribs! Ribs!). With the chicken legs, I removed the tendons inside the legs (thank you Jordan Williams) and injected them with Butcher BBQ Bird Booster, and then seasoned them with the Lovely Jubbly BBQ And Then Some. The brisket ended up being done after about 7 hours, with no stall, which was unexpected. To wrap the brisket, I put it in an aluminum tray and poured in the leftover injection liquid and some beef broth to really solidify the beef flavor, which is the ultimate goal. I was told before cooking that a Wagyu brisket will finish at a higher temp than I might be used to, and that was proven when it was finally done at 210 degrees internal.

A typical KCBS Competition timeline is:

  • 12:00- Chicken
  • 12:30- Ribs
  • 1:00- Pork
  • 1:30- Brisket

With these times, we start prepping the turn-in boxes with Kale a couple hours before they are needed so that it is done, and boxes start being made about 15 minutes before turn-in so we can ensure that the box looks as good as it can to control the appearance score. I will share my turn-in box photos below!

So, now the wrap-up. I was not overly happy with my chicken and ribs this time around, but it was too late to do anything about them. The chicken was soft and mushy, and the skin was rubbery. The ribs were not even texture-wise, with some being not as tender as I would’ve liked, but as I’ve said before, I am my worst critic. Flavor for both of them was plenty fine, but bad tenderness can ruin the whole box. Now for the new entries. The pork slices were tender, juicy, and tasted fantastic. I was very pleased with how they turned out. The brisket is the same, tender, not overcooked, juicy, and had great flavor. Let me tell you, if you have a little money and want to try something new, get a Wagyu brisket; you won’t be disappointed. I quickly found out why Wagyu wins these competitions.

And now, results;

  • Chicken- 53rd of 58 Teams
  • Ribs- 55th of 58 Teams
  • Pork- 39th of 58 Teams
  • Brisket- 27th of 58 teams.
  • Overall, 47 of 58 teams.

As I mentioned, I was not happy with how my ribs and chicken turned out, and the judge’s scores reflect that. Just more to practice before the next one. I was pleasantly surprised at how my pork and chicken turned out as they were my first time, but I’ll take it! I was not last in any category, so I have nothing to complain about! Now, there was one more thing to talk about… what was it? Oh! That’s right! The Kids Que!

This was Ellie’s first time ever doing a Kids Que, as I mentioned, and the pork that she cooked looked seriously good. AND SHE WON! She took Grand Champion in her very first attempt, and I couldn’t be a prouder father! She used both of my Lovely Jubbly BBQ rubs, along with Blues Hog Champions Blend BBQ sauce, and absolutely nailed it!

The next competition is June 13- 15th for the fantastic Bringin’ Home the Bacon competition in West Salem, WI!

Don’t forget to check out http://www.lovelyjubblybbq.com for our signature rubs and even more great BBQ products and accessories! Our rubs are also exclusively in store at Ava’s a posh boutique in Watertown, WI, if you just can’t wait for shipping!

If you are looking for a Pit Boss pellet grill or other Pit Boss accessories for yourself or someone you love, follow the link below to the Pit Boss website, where they have some fantastic deals on some even more fantastic products! As an avid Pit Boss user, I couldn’t be more proud to be an affiliate of Pit Boss Grills, and I look forward to growing this partnership over time. We have also become affiliated with Weber Grills as well, which is my favorite grill of choice for cooking everyday meals. We have the Weber Grills link below as well for your convenience! 

Pit Boss Grills- https://pitbossgrills.77jaha.net/zxx49x 

Weber Grills- https://weberinc.sjv.io/e1kGrZ

As always, keep cookin’ and Lovely Jubbly!

Beef Tri-Tip

I decided to do a series of different recipes during the month of May because of National BBQ Month. To start the month off, I decided to go with the highly underrated, Beef Tri-Tip!

As you may have gathered, I think that this cut is the most underrated cut on the cow. The Tri-Tip comes from the bottom of the sirloin, and at the bottom, it ends in a sort of triangle which is where the name “Tri-Tip” comes from (see diagram below). Usually, the sirloin is leaner than the front cuts of the cow, but you can still find some really good marbling. I do really like sirloin cuts, especially for things like tacos, sandwiches, and so on, because of the typically leaner nature, I think it gives a meatier and thicker bite, but a classic ribeye or NY Strip are still the kings of steak. One thing about Tri-Tip is that it is really common in California; it is often called the “California Cut.” This also makes it not as common in most other places in the country, like when talking to some people that this was on my agenda, they had never even heard of it, hence why its underrated.

I have done a Tri-Tip a few times, and every time it was excellent, but this was the first time I cooked a USDA Prime grade Tri-Tip. I picked it up from one of my favorite places, Wild Fork Foods. If you have never bought from them, you are missing out. I went in there looking for either a Tri-Tip or Picanha, but I ultimately went with Tri-Tip, obviously. The USDA Prime grade is very well marbled and very good quality meat, and in this case, the price wasn’t too bad either. As you can see in the below photo, the quality of the Tri-Tip is really good. You want that deeper red color, and you can see all the fat marbling in there, too.

I prepared the Tri-Tip like I would any other cut of beef, a good layer of my Lovely Jubbly BBQ The Everything all-purpose BBQ rub. This rub is great for any kind of beef because of the bigger chunks of salt and peppercorns, and granulated garlic to bring out the beef flavor, without overpowering. To cook it, I used my Old Country BBQ Pits G2 insulated offset smoker with hickory wood. The offset gives a really pure smoker flavor (as long as it is burning clean), and I had a new gadget for it that I wanted to try out, so that’s another reason why I used it. More on the new gadget in the future. I dialed the smoker to 250 degrees, and placed the Tri-Tip in there, on a pan to help save cleanup.

The great thing about an insulated offset is that it is very fuel-efficient. I only added a stick to it once in the 2-hour cook, and it was within 20 degrees of 250 degrees throughout the entire cook. I set my meat probe to go off at 125 degrees internal for the Tri-Tip. At 125 degrees, it is not too rare, and it will carry over as it rests, which will help bring the temp up a little more. In this case, it carried over to about 132 degrees internal before starting to come back down slowly.

As you can see in the upper-left photo, it has a really deep red color from the smoke, and it was perfectly rare-medium rare inside, as you can see in the other photo. It was perfectly tender, well seasoned, and was not oversmoked, so all-in-all, it was a very successful. If you have been wanting to try a Tri-tip but weren’t sure if you should pull the trigger, definitely do it! It is such a fantastic cut of meat.

Don’t forget to check out http://www.lovelyjubblybbq.com for our signature rubs and even more great BBQ products and accessories! Our rubs are also exclusively in store at Ava’s a posh boutique in Watertown, WI, if you just can’t wait for shipping!

If you are looking for a Pit Boss pellet grill or other Pit Boss accessories for yourself or someone you love, follow the link below to the Pit Boss website, where they have some fantastic deals on some even more fantastic products! As an avid Pit Boss user, I couldn’t be more proud to be an affiliate of Pit Boss Grills, and I look forward to growing this partnership over time. We have also become affiliated with Weber Grills as well, which is my favorite grill of choice for cooking everyday meals. We have the Weber Grills link below as well for your convenience! 

Pit Boss Grills- https://pitbossgrills.77jaha.net/zxx49x 

Weber Grills- https://weberinc.sjv.io/e1kGrZ

As always, keep cookin’ and Lovely Jubbly!

The Best Burgers

Who doesn’t love a good, juicy cheeseburger grilled to perfection on a summer day? I certainly do! So I am offering my tips for the perfect cheeseburger to help kick off the grilling season.

When I make a burger, I usually start with 80/20 ground chuck, which is 80% lean to 20% fat. It is the perfect blend that offers a meaty bite, while also having enough fat to add flavor and juice. Any leaner blend of ground beef will work, but you will really want to watch them as they cook so they don’t dry out. In addition to that, a fattier ground beef blend, like 73/27, will be juicy, but you need to consider weight loss because there is more fat to render, which could cause your burgers to shrink as they cook.

One trick that I can really offer is to add mayonnaise to your beef blend. My rule of thumb is 2 tablespoons of mayonnaise per pound of meat. This allows for added moisture and acts as a binder to help hold the meat together as well. Don’t worry, for you non-mayo people out there, you don’t taste the mayo at all. I take the ground beef, add it to a large bowl, add the mayo, and mix it all up with my hands until the beef is all coated with mayo.

I have a burger patty press that I make mine with, which helps a lot with making sure that you have a uniform size with every patty that you make. I typically will make a 1/3 pound patty, which I find to be the perfect size that can easily fill you up, and isn’t too much if you decide to go back for more. Once I have the patties formed, I put them on a sheet tray, and this brings on my next tip: using a finger or your thumb, press an indent into the center of each burger. What this does is prevent the burger from puffing up while it cooks, and leaving you with some strange-looking meatball-burger hybrids. In other words, while the burgers cook, they stay flat. Once the indents are made, I then give a nice layer of our Lovely Jubbly BBQ’s The Everything all-purpose BBQ rub on both sides of the burgers and leave it sit while the charcoal lights.

I use my trusty Weber 22″ Kettle when I’m making burgers, and some Royal Oak Lump Charcoal, which adds great charcoal and wood fire flavor. I set my Weber Kettle up for 2-zone cooking, which means that the charcoal gets dumped out on one side of the grill, leaving the other side as the “cool” side for indirect cooking and warming. I place the burgers on the cool side to start so they can start coming up to temp inside without the outside burning. After about 5 minutes, I’ll use my insulated grill gloves and turn the cooking rack over to the hot side and start searing the burgers to get some color on the outside. At this point, there’s a lot of juice dripping on the coals, which will help add some flavor to the fire, but it will also cause flare-ups, so make sure that you are keeping an eye on them so they don’t burn. Once I get good color on each side of the burgers, I’ll move them back to the cool side, and then I’ll start placing the desired cheese slices, and close the lid for 2-3 minutes to help melt the cheese.

It doesn’t hurt to take your instant-read thermometer and check the internal temperature of the burgers throughout the cook to track how fast they are cooking. It is recommended to cook ground beef to at least 160 degrees for food safety, but after about 10 minutes of cooking, it usually gets there. However, it depends on the temperature of the grill as well. Once the cheese is melted, the burgers are done, but it certainly doesn’t hurt to let them rest for 5-10 minutes so the juices can redistribute throughout the meat and not run out as soon as you take the first bite. Top the burgers with anything you like, and enjoy!

Don’t forget to check out http://www.lovelyjubblybbq.com for our signature rubs and even more great BBQ products and accessories! Our rubs are also exclusively in store at Ava’s a posh boutique in Watertown, WI, if you just can’t wait for shipping!

If you are looking for a Pit Boss pellet grill or other Pit Boss accessories for yourself or someone you love, follow the link below to the Pit Boss website, where they have some fantastic deals on some even more fantastic products! As an avid Pit Boss user, I couldn’t be more proud to be an affiliate of Pit Boss Grills, and I look forward to growing this partnership over time. We have also become affiliated with Weber Grills as well, which is my favorite grill of choice for cooking everyday meals. We have the Weber Grills link below as well for your convenience! 

Pit Boss Grills- https://pitbossgrills.77jaha.net/zxx49x 

Weber Grills- https://weberinc.sjv.io/e1kGrZ

As always, keep cookin’ and Lovely Jubbly!

2025 Easter Recipe

This week’s blog post is all about my featured recipe for this upcoming Easter, pulled ham.

Pulled ham is a trend going around the BBQ social media groups, so I decided to do my part and stay with the times. I used a just over 8-pound Sugardale ham shank that I got on sale from Pick ‘n Save, similar to the ham I used in my 2024 Christmas recipe. It is very important to not get a spiral-cut ham. This is important because the spiral-cut hams are cut into small slices already, and taking it higher than 135 degrees will very easily dry it out, and nobody likes a dry ham.

A cured, pre-smoked ham is already completely cooked, so when you are doing one for a holiday, you are really only heating it thoroughly. Usually, 130-140 degrees internally is enough for these hams to make them perfectly tasty and juicy, however, for pulled ham, it is much different. Much like doing pulled pork with a pork shoulder, you want to take the ham up to about 200 degrees internally or until probe tender. Probe tender means that the temp probe goes into the meat, and it feels like a hot knife through butter with little to no resistance.

Preparing this ham is very easy, I took it out of the package, cut grooves into the exterior of the ham to help it expand while it cooks, and seasoned it with our Lovely Jubbly BBQ, And Then Some BBQ Rub around the entire exterior of the ham. I only went with one rub because the ham is cured, and I didn’t want to make the ham too salty by using The Everything all-purpose rub as well. I cooked the ham on my Pit Boss Sportsman 1100 and used my usual Lumber Jack Competition Blend pellets. I cooked the ham at 250, and it cooked for about 8.5 hours. Once the ham hit about 160 degrees internally, I placed it in an aluminum tray, and wrapped it in foil to steam and get more tender throughout the rest of the cook.

Once the ham was done, I gave it about an hour’s rest in the 170-degree oven and let the moisture spread back into the meat. Once it was time, I put on my nitrile gloves with the cotton glove liners for heat protection, and the ham pulled perfectly soft and was still plenty juicy. I was surprised by this, given that I had only heard about this technique on social media, and we all know what that sometimes means, but it was juicy, soft, and very flavorful. This is absolutely a recipe worth trying for Easter, or indeed any other time of the year, as it can be used in so many different ways.

Ingredients:

  • 1, 8-10 pound Sugardale Ham Shank, not spiral cut
  • Lovely Jubbly BBQ’s And Then Some BBQ Rub
  • Aluminum Tray (for wrapping)
  • Aluminum Foil (for wrapping)

Recipe:

  • Score the outside of the ham to allow for expansion during cooking
  • Season liberally with the And Then Some BBQ Rub
  • Prepare smoker for indirect cooking and set to 250 degrees
  • Place the ham in the smoker and let cook until 160 degrees internally
  • Once the ham is at 160 degrees, then place in a tray and wrap in foil.
  • Let ham cook until probe tender, or about 200-202 degrees internally
  • Rest for about 45-60 minutes
  • Pull the ham and enjoy!

Don’t forget to check out http://www.lovelyjubblybbq.com for our signature rubs and even more great BBQ products and accessories! Our rubs are also exclusively in store at Ava’s a posh boutique in Watertown, WI if you just can’t wait for shipping!

If you are looking for a Pit Boss pellet grill or other Pit Boss accessories for yourself or someone you love, follow the link below to the Pit Boss website where they have some fantastic deals on some even more fantastic products! As an avid Pit Boss user, I couldn’t be more proud to be an affiliate of Pit Boss Grills and I look forward to growing this partnership over time.

As always, keep cookin’ and Lovely Jubbly!

Porkmania- Franklin WI

This week, we are reviewing Porkmania, the double Rib competition that was held at the Polish Center of Wisconsin in Franklin on April 5th.

This competition was sanctioned by the Rib Cook Off Association, which is a fantastic organization that has just started its 2nd year. There were 3 categories for this competition: Wet (sauced) Rib, Dry (no sauce) Rib, and a breakfast ancillary cook. All of the meat for this competition was provided, which is always a great bonus, and the breakfast meats were provided by the event sponsor, Jones Dairy Farm in Fort Atkinson, WI, which is a place I am very familiar with as I used to be the head of security there, many moons ago.

I decided just to do the 2 rib categories this time as those are all that’s required for association points, and it saved a little bit of money. I liked this competition because it was only an hour’s drive there, which meant that it was one of my closer ones this year, at least at this time. Friday Night, I got the trailer all packed up and ready to go, so all we had to do Saturday morning was wake up and take off. We got there about 7am, found a parking spot, and started setting up. 42 teams were signed up to cook at this comp, so the competition was strong.

The cook’s meeting was at 8am, with turn-ins being at 12 for the breakfast cook, 1pm for the dry rib, and 2pm for the wet. As soon as I got the ribs, which was right after we got there, the rib prep started. It started with trimming them down to the even rectangular slabs of ribs that I like to compete with. This helps ensure that they are going to cook evenly and regulate the size. I injected each rack with Butcher BBQ Pork Injection and then seasoned it with my Lovely Jubbly BBQ The Everything all-purpose rub, and then again with my And Then Some BBQ rub. At 9:30, the first 2 racks of ribs went on, and at 10:30, the second set did. As usual, I won’t go into too much detail about my rib recipe, but I will link to my Ribs! Ribs! Ribs! post if you are interested in my technique.

For the dry rib turn-in, I pulled the ribs out of the wrap when they were ready and then used my sponsor this year, Weekend Bum BBQ’s Hot Bum rub in my fancy little thumb grinder to coat the top of the ribs before putting them back in the smoker. The thumb grinder is a fantastic tool I use to add more rub but have it not be as grainy, therefore making a nicer mouth feel. The trick to adding more rub is to do it while the ribs are still wet, that way, the moisture activates the rub, making it more effective. At that point, I put the ribs back on the smoker for 10 minutes to help dry that moisture and make them a true dry rib. After the 10 minutes were up, I pulled them off and started slicing with my Dalstrong brisket knife. I had plenty of good ribs between the 2 racks, but I found the best 7 and made the box. I really felt good about the dry ribs after they were turned in, great bite, great flavor, and plenty juicy.

The wet ribs were done about 45 minutes early, so I pulled them off, drained the wrap, and placed them in the resting bag. I had some issues with these racks, being that there were some weird crossbones in both of these racks, but I was able to pull out the 6 minimum good bones, sauced them, and put them back on the smoker to set the sauce for about 10 minutes. I made my turn-in box and turned them in, but I was not very happy with the second batch of ribs. they were very tight, and I feared that they weren’t going to be tender enough for the judges, but there was nothing I could do at that point.

Usually, it’s a standing joke within BBQ competitors that “if you don’t like them, usually the judges will.” That was my only hope with the wet ribs, but I was able to do something well, and that was to prove the old adage wrong. Awards started closer to 3 and while I didn’t win anything in the door prize raffle, I still won because I donated 1 bottle of each rub, and I really hope that whoever grabbed them really enjoys them! The awards were reversed compared to the turn-in times, so the wet ribs were announced first. I did not get a call in this category, which I expected since I wasn’t happy about them. I came 34/41 teams in the wet rib category.

The dry rib, on the other hand, I was really looking forward to because I was confident in that cook. 10th through 6th were announced, and my ticket number (448) wasn’t called yet. Then we get word that 4th and 5th place tied, which is always cool. As he started reading the numbers for 5th place, 4…….4……..8! BOOM!!! 5th place in the dry rib category! I was shaking with excitement as I walked up to the front of the room with a few fist bumps from others on the way up there and a hug from my good friend Ron Strohbusch. The entire walk, there was a huge amount of noise from where my family was sitting, and rightfully so! So I got my medal, check, and photo taken, and that was it, validation that I was doing it correctly, and I will never stop competing now. This is way too much fun, plus I can ride this high for a while. Onto the next! Which is Minnesota in May, May 9-10 for a fun KCBS Masters Competition.

Don’t forget to check out http://www.lovelyjubblybbq.com for our signature rubs and even more great BBQ products and accessories! Our rubs are also exclusively in store at Ava’s a posh boutique in Watertown, WI if you just can’t wait for shipping!

If you are looking for a Pit Boss pellet grill or other Pit Boss accessories for yourself or someone you love, follow the link below to the Pit Boss website where they have some fantastic deals on some even more fantastic products! As an avid Pit Boss user, I couldn’t be more proud to be an affiliate of Pit Boss Grills and I look forward to growing this partnership over time.

As always, keep cookin’ and Lovely Jubbly!